Making the right connections: Testing new port connectors for flow applications
Introduction:
Many applications of the µSiM require fluid to be continuously supplied to the microfluidic devices. We use laboratory tubing (typically Cole-Parmer/Tygon Tubing with I.D = 1/16″) that is connected to syringes or peristaltic pumps to do so. However, interfacing the tubing with the current entry and exit ports for the bottom channel is not trivial as they were designed for the use with 20 µL pipette tips to introduce fluid as opposed to more elaborate flow loops. This has resulted in multiple bespoke solutions being developed and employed in the lab (e.g., the use of syringe tips embedded in small furniture bumpers mounted on the device, the use of PDMS spacers, etc.).
In the post, I demonstrate new and more robust fittings that can directly interface with typical tubing used in the lab. The assembly process is straightforward, and the fittings are easily available, resulting in an elegant and useful solution to fluid handling in the device.
Method 1: Using “Olive connectors” from Eden Tech
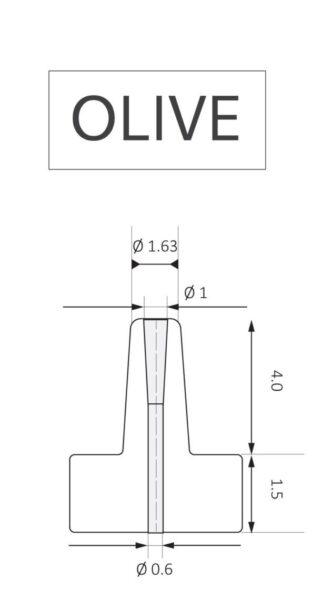
The Olive connectors from Eden Tech are simple, plug-and-play components that work straight out of the box (Ziploc bag?). The connectors can be fixed onto the entry and exit ports of the device using a thin double-sided O-ring adhesive that is shipped with the connectors. The connector consists of a flat circular base (~4 mm in diameter) with a 5 mm extrusion that acts like a barbed pipe fitting. The component is designed to have a very small dead volume (< 1 µL) which is useful to limit the use of expensive reagents.
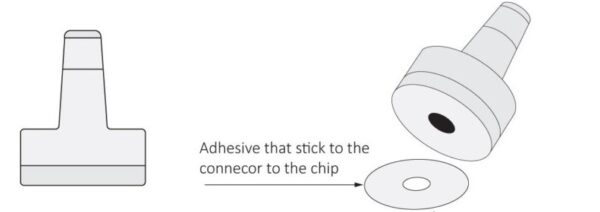
Eden Tech, a small European Start-up, sells these connectors and the bio-compatible O-ring double-sided adhesive strips with a 3 mm hole stamped out from the center of each adhesive. The olive connectors are designed to adhere directly to the O-ring as shown below:
Assembly steps:
- Use a pair of tweezers to hold the connector.
- Expose the adhesive on the O-ring strip as shown below.

- Align the through holes in the connector and donut-shaped O-ring adhesive strip.
- Place the olive connector on the adhesive strip and press firmly to ensure bonding between the two.

- With a slight twisting motion, peel the adhesive off the paper strip using the connector. The O-ring adhesive should come off easily. Ensure that you do not touch the O-ring with gloves as that leaves a residue.

- Align the connector + adhesive with the entry and exit ports of the device. Aligning the holes takes some practice but you don’t have to be exact.
- Press the connector +adhesive firmly down on the device. Ensure that the device is on a flat surface while doing so.
- Repeat the above steps for the other ports as required.
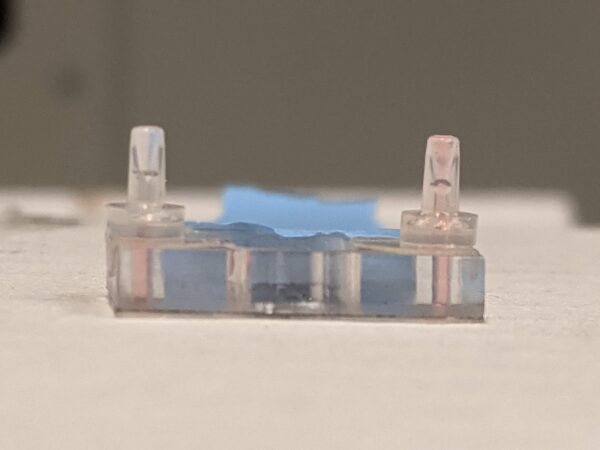
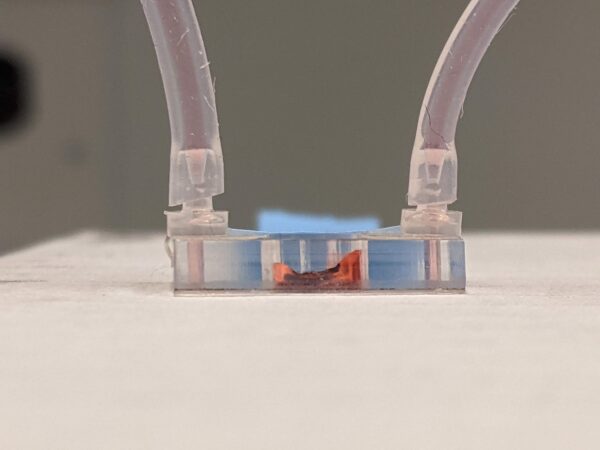
- Once the connectors are mounted on the device, slide the tubing directly (and gently) onto the top of the connector. Ensure that the tube is not too long as the excess weight of the long tube might peel away the connector from the device during assembly. Consider assembling the system with the device on its side and connector facing the user. This should mitigate the peeling of the adhesive.
- The final assembly is shown below:
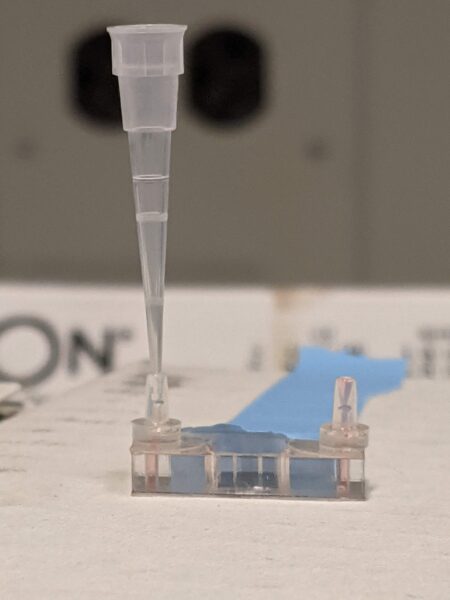
An additional advantage with these connectors is that the top port of each connector is designed for use with a P20/P200 pipette tip as shown here:
Feel free to reach out to me at araghuna @ ur dot rochester dot edu for more information on using these connectors.