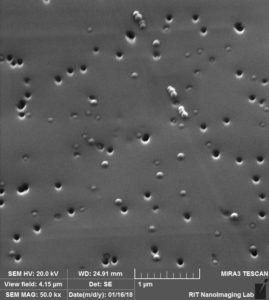
SEM images of Exosome Scale experiments (After Capturing)
Hello Everyone,
Following up the discussion that we had in my last post https://trace-bmps.org/sem-images-for-micro-nano-scale-experiments/about my SEM images after capturing and cleaning. It was suggested to tilt the samples and make sure that beads are inside the pores.

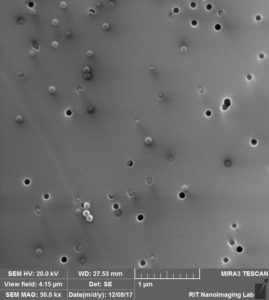
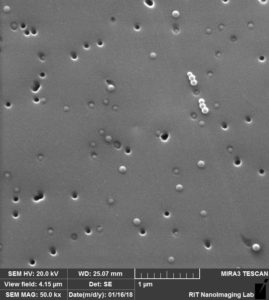
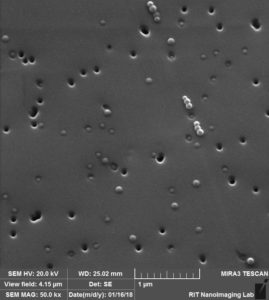
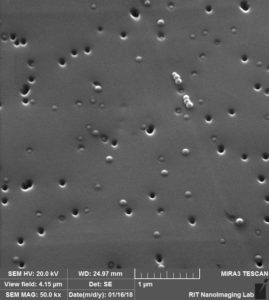
So I did a second round of SEM imaging on the same sample. And tilted images clearly shows the beads are inside the pores.
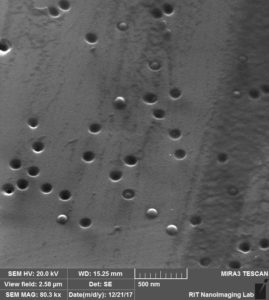
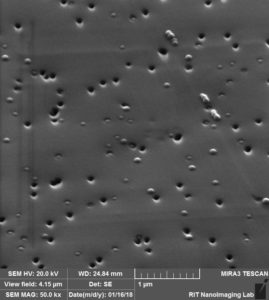
Tilted for 30 degrees:
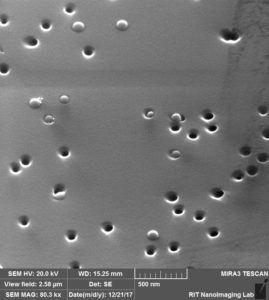
Tilted for 70 degrees:


So we can definitely conclude that these beads are captured inside the pores.
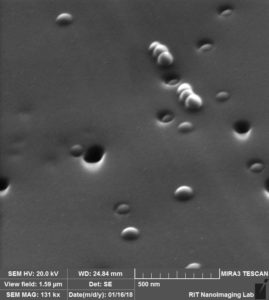
But besides the fact that beads are inside the pores, the other discussion regarding the SEM images could be why some of the beads are brighter and we claimed that they are on the surface of the membrane. So i talked to Dr. Hailstone who is an expert on electron microscopy field and he told me that this is called Edge Effect as you can see in the figure below that he also sent me.
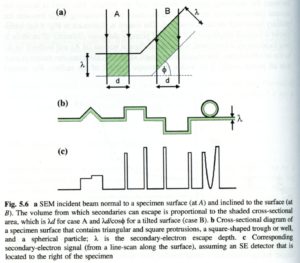
Imaging with secondary electron provides information about morphology and surface topography. The contrast is dominated by so called edge effect; more secondary electrons can leave the edges than in flat areas leading to increase brightness there like beads on the surface and edges of the pores.
So based on tilted images which proves beads are inside the pores in addition to edge effect concept which shows the non-specific capturing of beads. We can fairly make this conclusion that we have beads that are captured inside the pores and on the surface non-specifically.
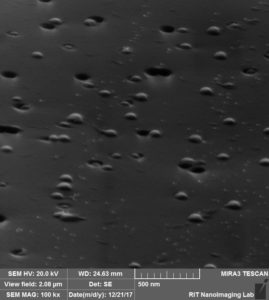
Although, if you look at the flat SEM images from my last post or the first two figures in this post, there are some other beads which are not as bright as non-specific beads and not clearly inside the pores. If they are on the surface why they are not as bright? at the same time they are not clearly inside the pores, because we are not seeing the pores. My hypothesis was they are sitting on the pores and that’s why we can’t see the pores. In order to test this, i decided to do another SEM but this time i picked a region of interest and started tilting gradually the sample while staying in the same region of interest. The sample was tilted 10 degrees in each of the figures. Again, we can clearly see beads that are inside and those that are captured on the surface, but regarding of other beads, i wasn’t able to see the pores underneath of them even with tilting.
Flat Sample 10 Degrees tilted

20 Degrees Tilted 30 Degrees Tilted
40 Degrees Tilted 50 Degrees Tilted
Zoomed in 50 Degrees tilted 60 Degrees Tilted

So as you can see even with tilting the sample i was not able to see the pores underneath of the beads that i had assumed are sitting and captured on the pores. So once again, i talked to Dr. Hailstone and explained everything for him. He believes that no matter how much you tilt the sample if the bead is larger than your pores and it is sitting on the top of it, you would’t be able to see the pores. He believes that based on the fact that beads and pores are not perfectly uniform in addition to the height difference between these beads with bright beads (Non-specific on the surface) and again in addition to the fact that they are not spherical like bright beads, the only explanation would be that these beads are captured on the pores. 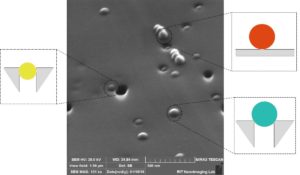
So as the conclusion, beads can be captured inside the pores (clogging- hard to release), on the pores (Ideal), or they can be non-specifically captured on the surface (hard to kick off).