Cell Suspension, Discoloration and Immunofluorescent assays – Marian
Discoloration Assays
Introduction: pnc-Si chips were monitored for discoloration to find chips that had not been previously RTP’d. These assays were necessary in order to find chips that could potentially be used for cell proliferation assays later.
Setup: pnc-Si chips were autoclaved and placed in a 24-welled plate with 300uL of DMEM and incubated at 37C conditions. Enough media was added to ensure that all surfaces were saturated.
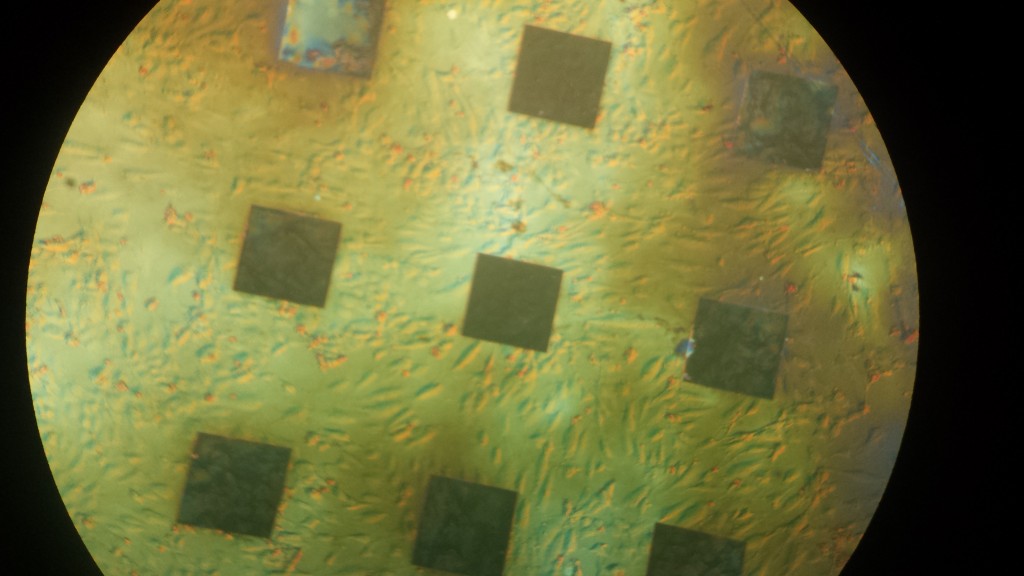
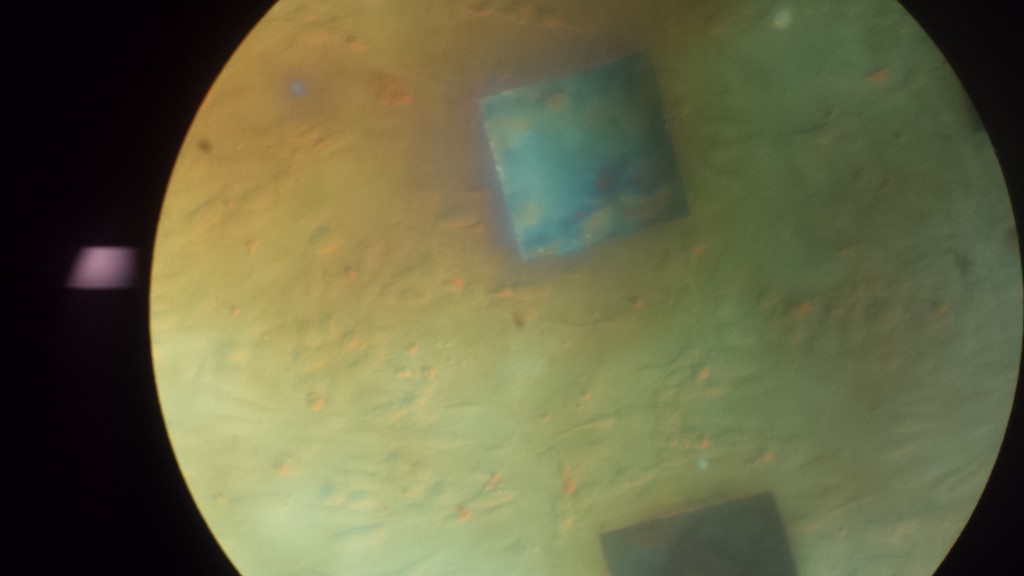
Once a day, the chips (manufactured in 2009) were visualized for changes in color. If changes were noted, chip was removed, washed with deionized water and then rapidly dried using nitrogen gas. Samples were then placed on a glass surface for imaging and images were acquired using the 5x objective on the light microscope.
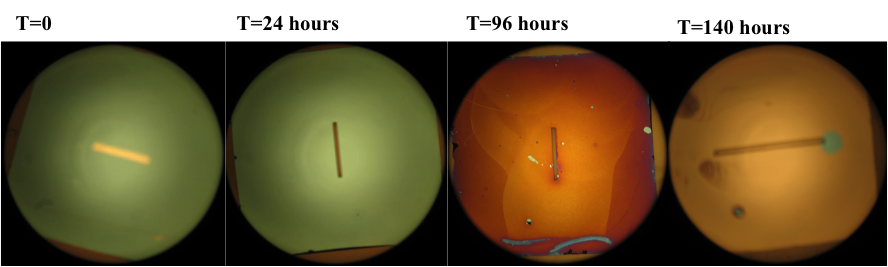
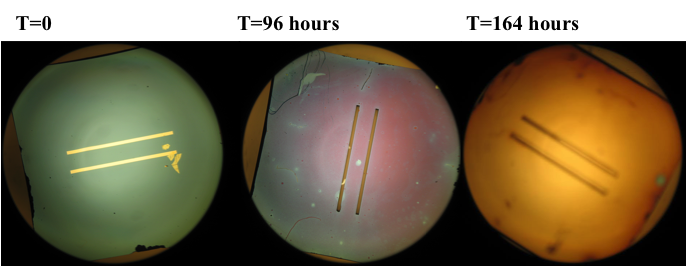
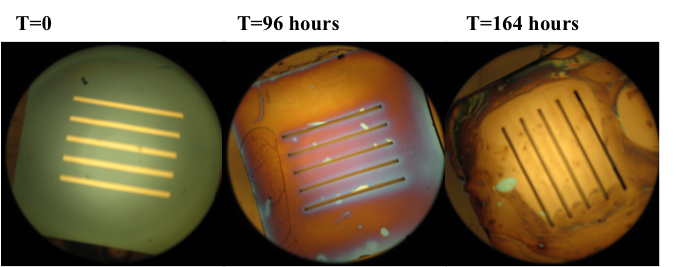
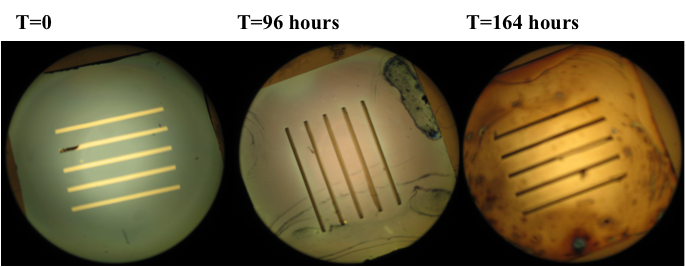
Results: The color changes observed were from blueish green -> purple -> gold -> gray. Substantial color changes were not noted on most chips until 96 hours into the experiment. The color change was not noted to be uniform on the chips and membrane degradation was noted on some membranes. Unfortunately, it was difficult to compare the color changes to the membrane dissolution since chips were often times damaged during the washing and drying process.
Carl’s Chips
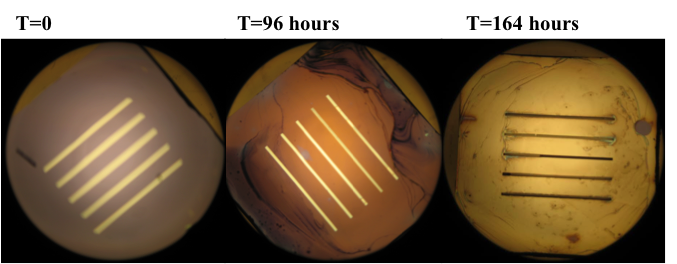
Wafer # 330
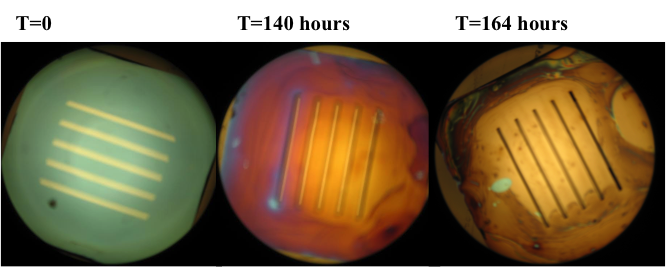
Wafer # 464
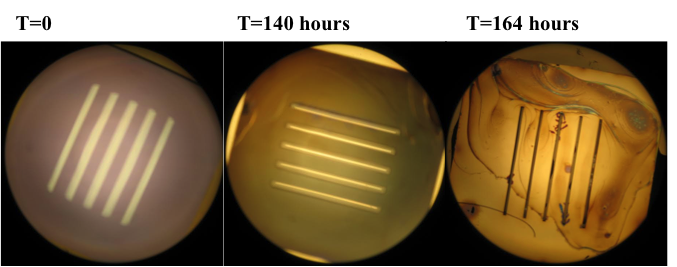
Wafer # 451
Wafer # 567
Wafer # 454
Wafer # 570
Discussion: Discoloration assays on multiple chips displayed changes at approximately 96 hours. According to the paper published in Biomaterials in 2010, we were expecting to see discoloration starting at 24 hours for the no RTP pnc-Si chips. In addition to a slow rate of discoloration, it was also noted that the color changes were not uniform across the chip. The constant handling of the chips made it difficult to avoid damage during the discoloration tests.
Since the chips had been sitting around for years, Dr. McGrath proposed that we plasma treat the chips to see if there’s a change in the rate of discoloration. Unfortunately, we did not have enough chips to spare, so we did not perform stand-alone discoloration assays on chips that had been plasma treated.
Cell Proliferation Assays
Hypothesis: The cells will become confluent on membranes and stay suspended in the window even when membrane is completed dissolved.
Cell proliferation studies were performed using HUVEC cells on pnc-Si chips that were used for discoloration assays above. Due to the supply of chips, this assay was only performed on 3 of the chips that we performed the discoloration assays on. Cells were used between passages 7-10 and stored in the 37C incubator in the lab. Media was changed every 48 hours after reaching confluence. The cells were checked every 24 hours for growth and integrity of membrane.
Part 1
Setup: Chips were plasma treated for 15 minutes to remove debri. Chips were then placed in a petri dish without a device and cells were carefully seeded on top.
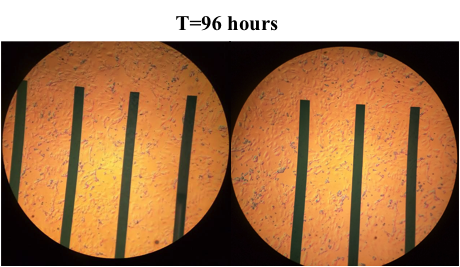
Wafer # 330
Wafer # 464
Wafer #570
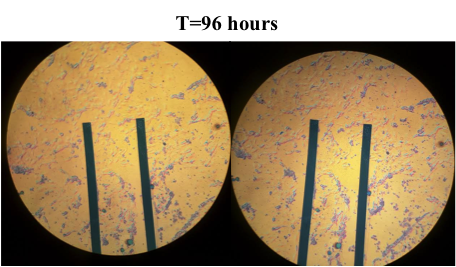
Discussion: Cells were seeded at densities of approximately 5-8 per window initially. Discoloration of the chips appeared to be more uniform throughout the chip. The membrane was completely dissolved at 96 hours but showed little signs of disappearing at 48 hours. We noted that on these chips, the cells to be confluent around the membrane but not spread over the membrane as expected.It is difficult to tell from the images what the cells had decided to do when the membrane finally disappeared.
Part 2
Setup: Chips were plasma treated for 15 minutes to remove debri. Chips were placed in petri dishes and carefully seeded with cells and surrounded with media.
| Wafer ID | Observation | Notes |
| 187 | Approximately 7-10 cells on each membrane noted on day 0. Membrane not wrinkled. | Membrane slowly wrinkled as opposed to disappearing. This experiment began on 10/8/15 and membrane was completely wrinkled on 10/11/15. |
| 265 |
Membranes wrinkled. There were approximately 4-5 cells on each membrane noted on day 0 using transmission mode on microscope.
|
Cell proliferation difficult to view on wrinkled surface |
| 189 | Membranes wrinkled. There were approximately 5-7 cells on each membrane noted on day 0 using transmission mode on microscope. | Cell proliferation difficult to view on wrinkled surface |
| 195 | Membranes wrinkled. Approximately 8-10 cells on each membrane noted on day 0. | Cell proliferation difficult to view on wrinkled surface |
Cells difficult to view on wrinkled windows. Could not conclude whether the cells were adhered or not in reflection mode.
Part 3
Setup: Chips were plasma treated for 15 minutes to remove debri. Chips were placed in petri dishes and carefully seeded with cells and surrounded with media.
Wafer #187
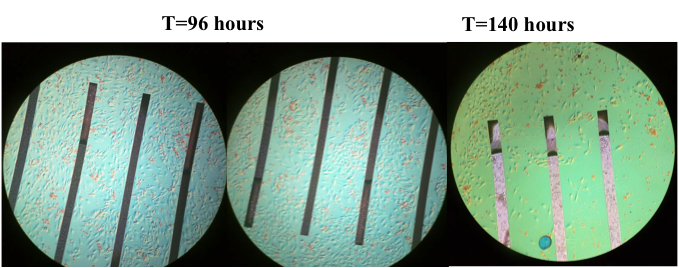
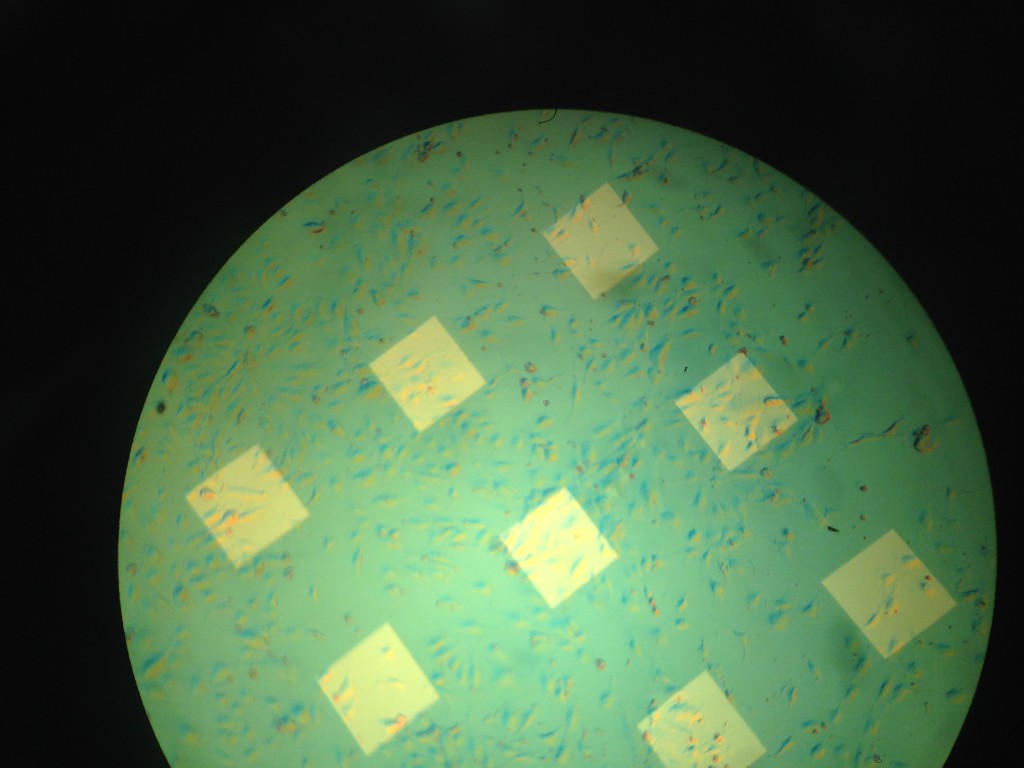
No membranes wrinkled. Experiment started on 10/11/15 at 4pm. Each chip appeared to have approximately 5-10 cells on each membrane window. 4 sample sets were conducted. Data below is representative of the best samples obtained from this experiment in which cells were present on the membranes. Media was changed every 48 hours during this experiment.
10x (Images taken on 10/17/15)
10x (Images taken on 10/19/15)
20x (Images taken on 10/19/15)

Discussion: On 2 windows on one of the samples of the new 187 chips, we could see cells proliferating and the membrane slowly disappearing on day 8 of the experiment. On day 9, I went to visualize the cells and saw that the membrane was completely gone, and cells no longer on the windows. This leads us to believe that the break of the membrane is violent enough to cause the cells to fall through the open space as opposed to stay suspended as we expected.
Moving forward, these assays may be re-performed but with an artificial ECM environment on the membranes (such as geltrex). Hopefully this will lay a foundation for the cells to grow on that will not be disrupted by the sudden breakage of the membrane.
The smaller window membranes seem to be the best starting point for more research in this area.
Immunofluorescent Microscopy
For this this portion of my rotation, I worked with Tejas on performing immunofluorescent microscopy on his nitride chips. For this project, the chips were placed in device made from PDMS with a volume of approximately 100uL per device.
The following protocol was followed:
- Fix cultures using 3.7% paraformaldehyde for 30 minutes in room temperature (chemically binds adjacent proteins), wash cells 3x with PBS for 5 mins
- Follow with a 10 minute incubation in 0.1% Triton X in room temperature (permeabilizes the fixed cells), wash cells 3x with PBS for 5 mins
- Incubate samples in 1% BSA for 30 minutes at room temperature (blocking to reduce chance of unspecific binding of antibody), wash cells 3x with PBS for 5 mins
- Wash with 1X PBS and incubate for 90 mins with primary antibodies in room temperature
- Rinse 2-3X with PBS and incubate for 1 hour with secondary antibodies at room temperature and with no light.
- Rinse cells 2X with PBS and incubate for 1 hour with phalloidin away from light at room temperature
- Rinse cells with PBS and incubate with DAPI for 110 minutes away from light at room temperature.
- Examine samples under fluorescence microscopy
Discussion: The samples were examined by Tejas under the microscope. Unfortunately, we were not able to see the individual proteins that we stained with the exception of fibronectin. We believe that this was due to the devices used for the experiment. Tejas is currently completing this project but for decellularization.
Overall, I learned a lot from my experience in the lab. Before this rotation, I was not familiar with cell passaging, or immunofluorescence!!
Thank you all for welcoming me into the group for the past couple of weeks!!…It was a blast! 🙂